Sourdough Ciabatta
I have a love hate relationship with ciabatta, mostly because I dislike handling wet dough.
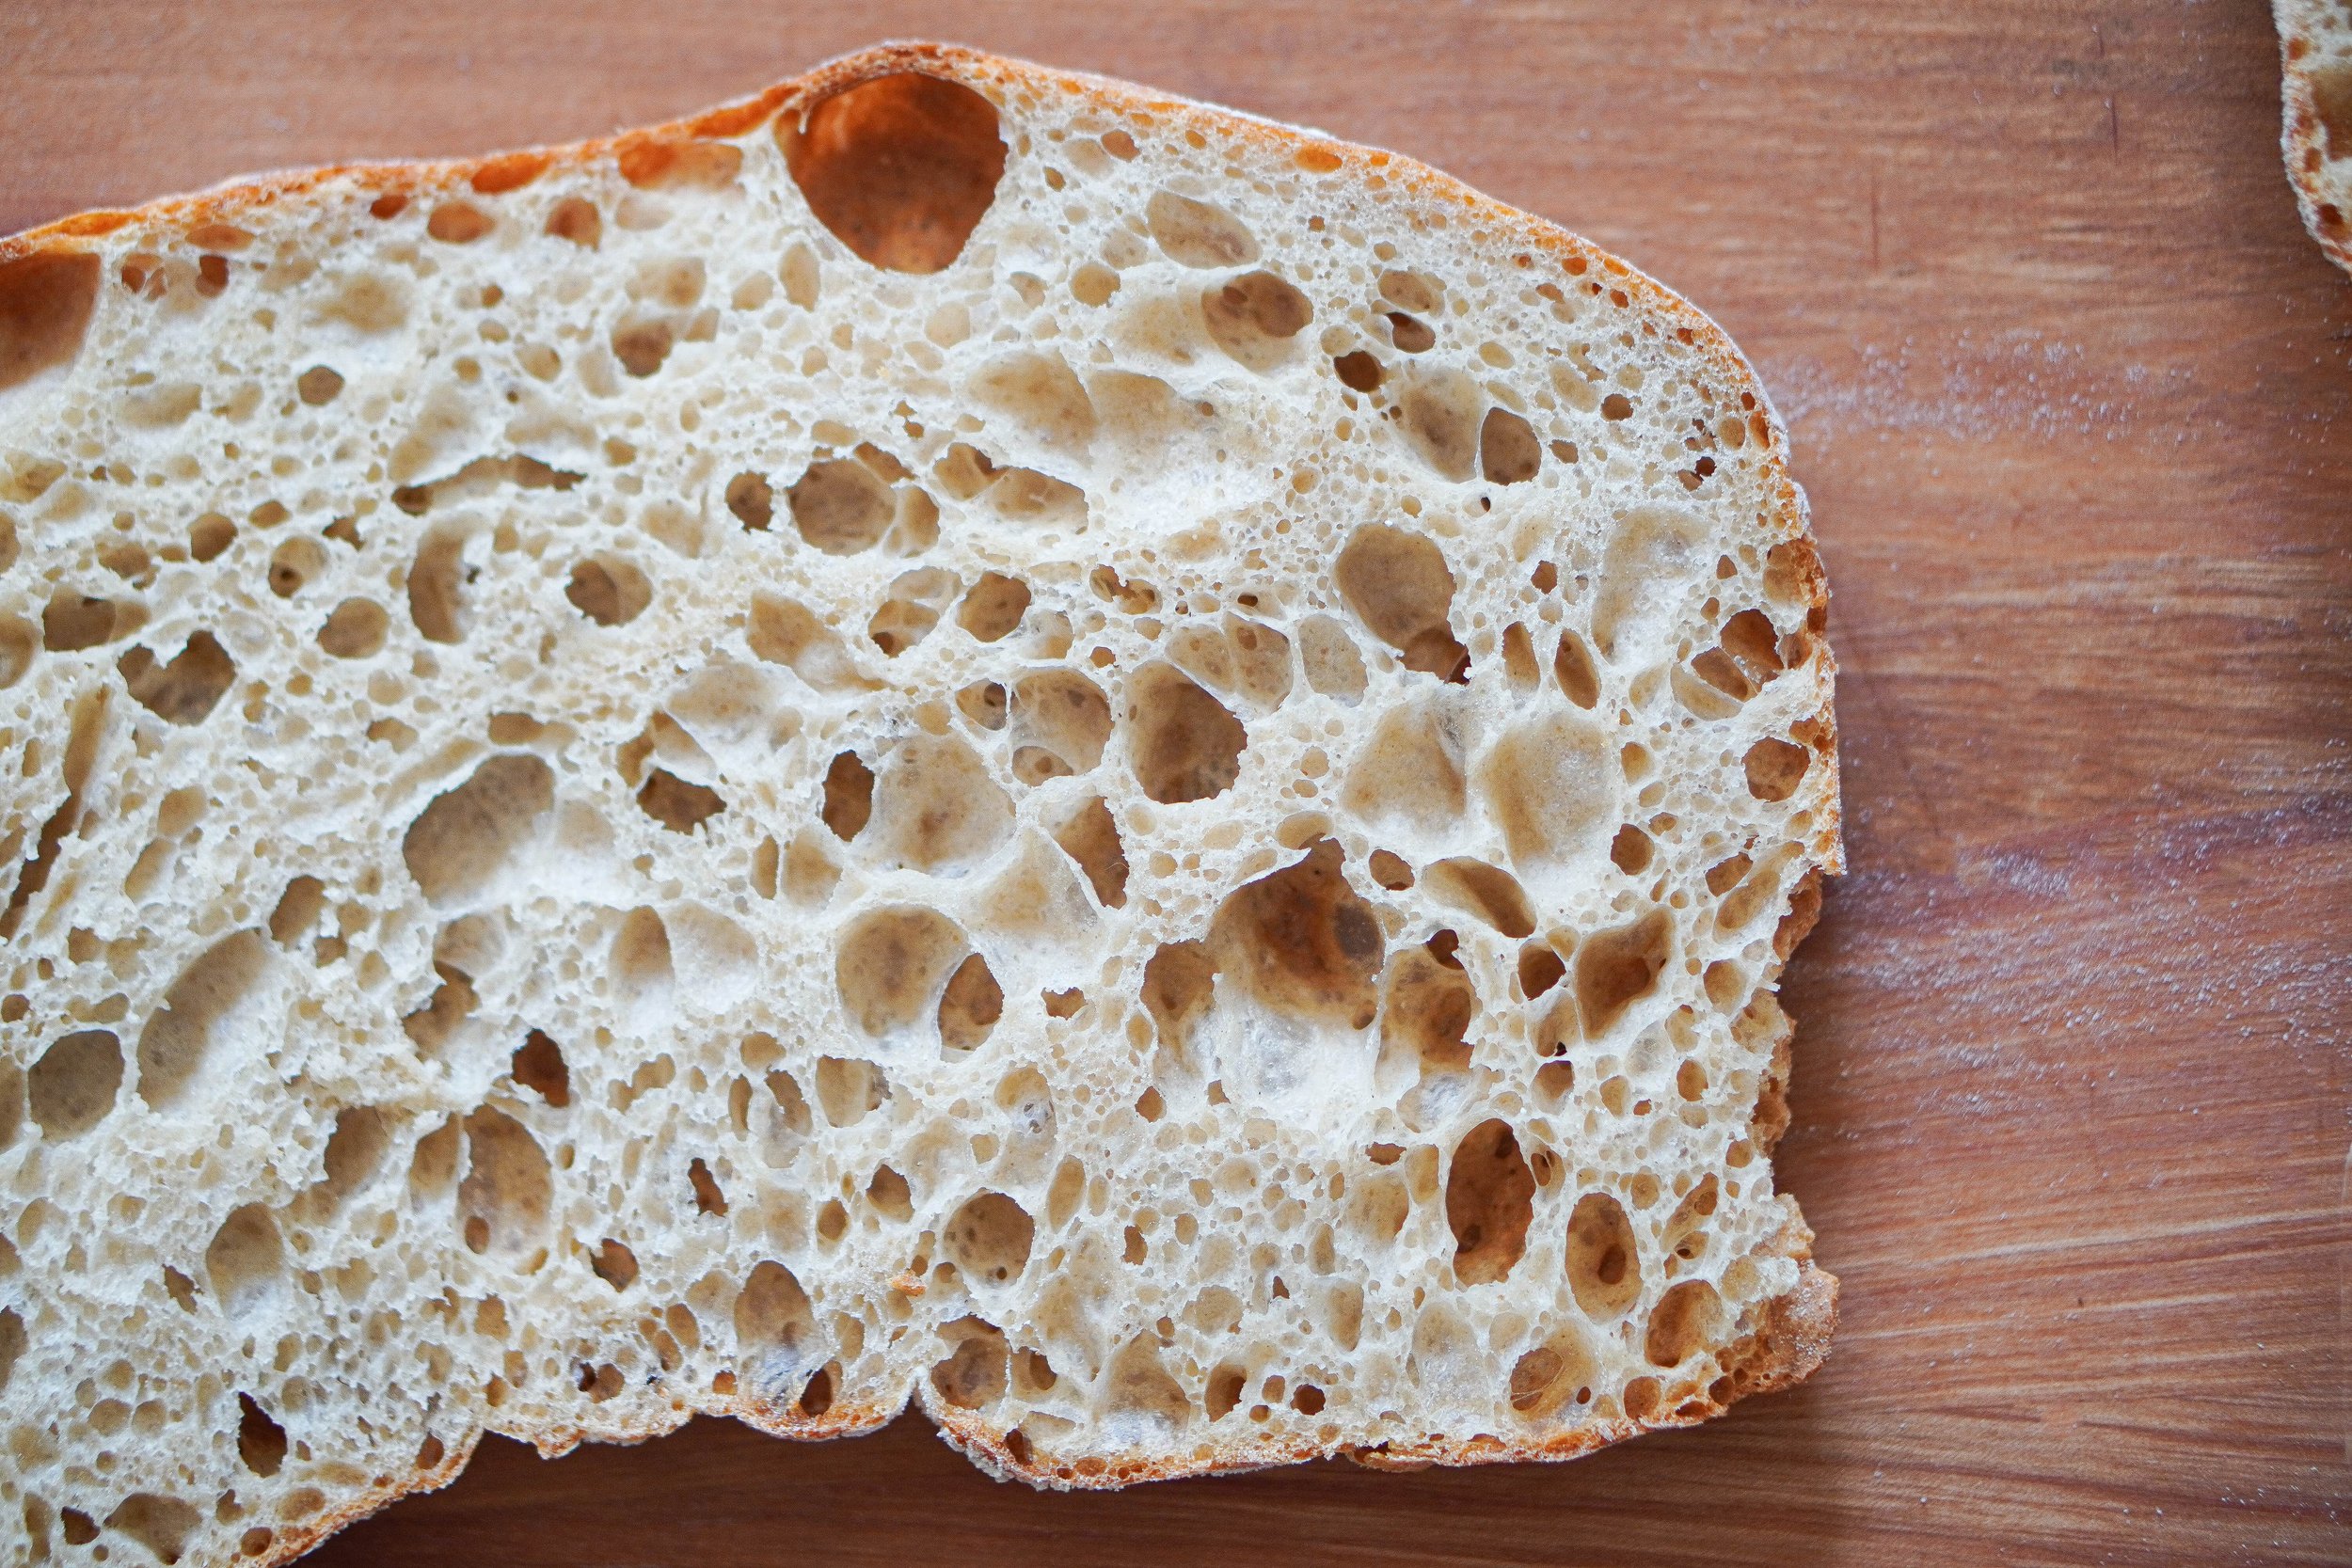
But who could resist those big air pockets?
And, honestly, since using this one-day method, I find the process actually quite hassle free. I also used to make the ciabatta into smaller buns—honestly, not sure why. Maybe I just thought that’s what one does with ciabatta, but here we are just going to make the dough into two long ciabattas. This is MUCH more convenient when proofing and baking.
The trick is to try to touch the dough as little as possible and, when you do touch the dough, be sure to WET YOUR HANDS. Trust me, it works much better than dusting your hands with flour.
We will be using stretch and folds to build the gluten, as we did with our country sourdough, but most of the gluten forming will be on its own.

This dough also has a high inoculation at 62.5%. Inoculation is the percent of sourdough starter in the dough. The higher the inoculation, the faster the dough will ferment.
And we are going to ferment this fairly quickly. In fact, the bulk fermentation takes me between 2-4 hours depending on the room temperature.
Fermenting this quickly does lower the sourness of the bread ever so slightly, but I do not find this to be a problem. If you want your bread to be extra sour, you can experiment with lowering the inoculation, BUT just keep in mind, the dough will take longer to rise, and we are going for a relatively quick sourdough here.
Also, there is NO shaping process here. You just plop the dough down and cut it in half. It’s ok if the ciabatta shape is a little wonky. It will still be delicious.
Disclaimer: the products mentioned in the blog section of this website are not offered under the cottage food operator’s permit.

One-day Sourdough Ciabatta
Ingredients
- 250 grams active sourdough starter*
- 320 grams water
- 7 grams salt
- 100 grams white whole wheat flour*
- 300 grams bread flour
Instructions
- Mix the active sourdough starter, water, and salt in a large mixing bowl (2.5 quart is ideal).
- Add in the white whole wheat and the bread flour and mix, mix, mix until it becomes a shaggy dough. Make sure it is well incorporated because we are not going to mix with our hands.
- Cover and allow the dough to rest for 20 minutes. You will perform at least three stretch and folds in twenty-minute intervals. This will develop the gluten.
- After 20 minutes, perform your first stretch and fold. Wet your hands and take one corner of the dough and stretch it out as far as you can without ripping the dough. Stop when you feel the dough start to tug back. Fold this piece over onto the dough. Continue for all four corners. Allow to rest for another 20 minutes.
- After 20 minutes, perform the second stretch and fold in the same way you did the first. Wait another 20 minutes and perform your third stretch and fold.
- If you are uncertain if the gluten has developed, perform a windowpane test. Stretch the dough until you can see light coming through it. If it breaks, then the gluten needs more development, and you can perform a fourth stretch and fold. If it doesn’t break, then you can start the bulk fermentation (or first rise).
- Allow the dough to rise for 2-4 hours. The amount of time the dough needs to rise will depend on the strength of the starter, the temperature, and the flours used. The dough should double in size (if using a 2.5-quart bowl, it will nearly fill the bowl).
- Once the dough has risen, it is time to shape it. Take your dough out onto a generously floured surface. Gently shape into a rectangle and cut the dough in half.
- Generously flour a tea towel and gently place the two pieces of dough onto the tea towel. Make sure that the pieces are far enough apart so that they don’t stick together during the final proof. Cover the dough with the ends of the tea towel (or another tea towel if yours is too small) and allow to proof for 1-2 hours or until puffed up and bubbly.
- Once almost ready to bake, place your baking tray or bread pan with a lid in the oven and preheat to 475 Fahrenheit. Preheat for at least 30 minutes.
- Once your bread pan is preheated, carefully remove your baking tray from the oven. Using the tea towel, flip the dough (one at a time) onto your tray.
- Bake at 450 F covered for 15 minutes. Then, bake at 425 F uncovered for 20 minutes.
- Allow to cool for 30 minutes before slicing.
- Enjoy your delicious sourdough ciabatta! Ciabatta doesn’t stay fresh for as long as the loaves, so I would suggest freezing whatever you can’t finish in 1-2 days. You can slice before freezing and toast the sliced pieces right from the freezer.
Notes
Supplies
2.5 Quart Mixing Bowl with Cover
Fork for mixing
Kitchen Scale
Tea Towel
Baking Tray or Oval Cast Iron with Lid*
- I use the challenger bread pan for this. However, you can use any pan you find suitable, preferably something that holds heat well. If you don’t have a pan with a lid, use the ice water method: before putting the dough in the oven, on the bottom tray of your oven, place an oven-safe open container with ice water. Then, put the unbaked dough on the top tray of your oven. Remove the water after fifteen minutes. This will help simulate the steam effect of the challenger bread pan and similar pans.
- You might use more or less sourdough starter based on the temperature of your room. Use more sourdough in the winter and less sourdough in the summer if the temperature of your house fluctuates.
- White whole wheat flour is simply a lighter version of whole wheat flour. You can use regular whole wheat flour in place of white whole wheat flour if you do not have access to it. Alternatively, you can use all bread flour.